Showing posts with label scenarios. Show all posts

Friday, September 29, 2017

Somewhere in Russia again - a Blucher AAR

Gaming life doesn't get any better when on a week you don't play Rommel, you play Blucher. Chris and I did our Thursday game this week with 250 point armies. He has been a painting machine when he can, building up his Russian forces. Tonight he brought 3 infantry and 1 cavalry corps totaling 18 units. His army morale level would be 6. He accompanied this army with 216 guns! Using Russian battery strengths of 18 guns, he brought 2 12# units, 1 8# foot unit and a horse unit. His artillery commander and a "Rally" trait corps commander filled out his roster.

The French army views the Russian position.

I know at only 250 points it would be expensive to bring the Guard but I did anyway. 2 infantry corps accompanied Napoleon and his guard along with 120 guns. Drouot, my artillery commander, rounded out the French force totaling 14 units. With Nappy being a "Legend", my army morale would be 7.

Russians deploy on their hill defending the crossroads objective.

When I arrived Chris had already set the board and the scenario to save time. We set the victory conditions making the town at the crossroads a 2 point objective. The farm in the valley and the hill on the road would be 1 point each. This configuration allowed for a draw outcome and would make the Russians have to move from their deplyment zone to contest 2 of them. We thought this fair and the battle began.

French Turn 1. II and III Corps advance against the Russian left.

French Guard heavy artillery take position overlooking the valley on the left

The French Plan. The Russians had a strong position with both flanks guarded by woods and their main body deployed on a hill at the crossroads. They outnumbered the French with a numerical superiority of guns as well. Any thoughts of winning this scenario by objectives quickly disappeared. The plan was simple - break the Russian morale. My two infantry corps would attack the Russian left. The Guard heavy guns would take up a position on the hill on my left providing overwatch on my flank while the remainder of the Guard Corps would stay in reserve. I would try to play to my advantages. The Russians on defense gain a bonus in melee while the French advantage is the Skirmish trait. This would be an infantry battle at long range. Wear my opponent down in firefights before launching advantageous charges into his lines. This is why I spread most of my artillery out amongst the brigades to beef up the firepower.

The Chevau-leger of III Corps advanced and screened the line of sight between the hill and the light woods allowing the infantry to reserve move up and gain some early ground. This maneuver was repeated by II Corps on their left. Now let's see what Chris will do. Russian I Corps advanced to contest the hill objective while his cavalry corps advanced to threaten the flank of the advancing II Corps. Russian heavy guns from II Corps conducted counter-battery fire on the Guard artillery. Rolling only 3 dice Chris rolled two 6s forcing the Guard guns to retire from the battle! So it's going to be one of those nights, eh? This was a major setback for the French losing essentially 17 points from the battle and fire support. Drouot had no artillery to command so he was wasted as well.

Drouot and staff search for the Guard 12-pounders. What the...?

The French attack begins

III Corps engages and the firefight begins. II Corps brigades prepare positions against the threatening Russian cavalry. Guard lancers charge annoying Cossacks.

After losing my Guard artillery early, I saw my next deployment error. Infantry of the Guard were deployed within range of those same Russian guns and took an unnecessary hit. Chris advanced his cavalry placing his Cossacks well forward. Now I was forced to move my Guard and give up the opportunity for a timely reserve move later in the battle. My hand was tipped as I repositioned my forces to support the attack while keeping the Guard out of range of his pesky artillery. I should have deployed my reserve BEHIND the hill. 20+ games of Blucher you think I should know better!

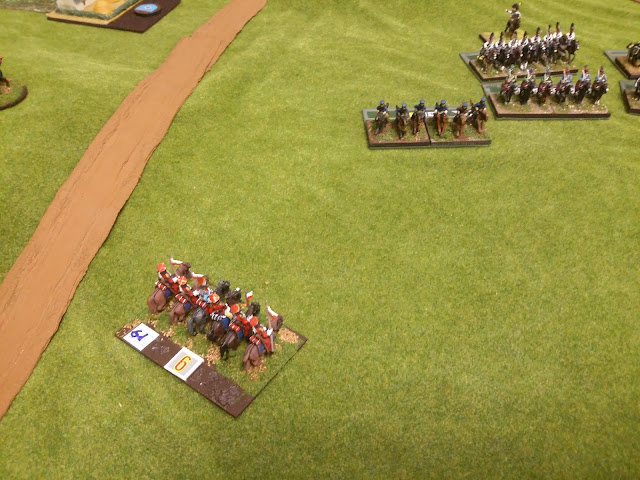
 The Middle Guard take cover behind the hill while Drouot continues looking for his missing artillery.

Guard Lancers repulsed by Cossacks! Again, what the...?

This was another disappointment in a series of disappointing French attacks. Concentrated fire on the Russians guns (8 dice) never resulted in more than one hit so while it did keep the Russian heavy guns from firing every turn due to retreats, the horse guns simply moved back up and fired into my lines. Skirmish fire between the two lines was a draw and it is here I had hoped to win the attrition battle but, alas, no. The occasional "6" was never supported with a "first 5" for my skirmish trait. Thankfully Chris made the fateful statement, "I've never charged prepared infantry with cavalry." I responded, "It is your army. Do as you wish.". He did.

2 Russian cavalry brigades charged each French square! I needed my troops to hold and II Corps withstood the cavalry onslaught inflicting heavy loss to the Russians. A total of 8 hits had to be absorbed while my brigades took a hit a piece. Now I needed to somehow deal with those Russian guns. They were killing me and losses were mounting.

Desperate times call for desperate measures! The French light cavalry hurl themselves at the Russian guns. 1 brigade has already been sacrificed from II Corps while III Corps courageously fights on!

The situation was getting desperate. My army had already lost 3 brigades and on the verge of losing a fourth - the III Corps light cavalry. The Guard guns disappeared early and most of my remaining brigades were worn. Three brigades of the Guard moved to support II Corps while a fresh brigade in III Corps moved forward to relieve its worn companions. It was only a matter of time before the Russians unleashed their fresh Corps into the fray. Napoleon needed something to happen NOW!

 Guard cavalry move to positions supporting II Corps. Russians activate their II Corps but only to advance a brigade to take the farm.

 The battle rages around the hill objective. A series of attacks and counter-attacks see the loss of the Russian horse guns and a determined III Corps cavalry brigade driving off their heavy pieces and now screen the Russian grenadiers.

A view from the Russian lines shows how worn they are becoming as well. 

Fortunes begin to change for the French. Russian fire dwindles as Chris begins to roll ice cubes. He couldn't buy a hit on the French while my skirmish trait starts paying dividends. The heroics of III Corps cavalry inspire French troops all along the line and they actually survive the hard fight and withdraw to safety behind the lines! At this point I still have only taken 3 hits to my army morale and the Russians losses have caught up. I need a quick and decisive push before Russian reserves relieve their battered comrades.

The Russian send a brigade to forage the farmland while the remaining forces play spectator to the events unfolding on the battlefield

Napoleon gallops up and issues stern orders to finish the Russians 

There is no time to wait. French Guard cavalry charge and overwhelm a Russian brigade while infantry reposition to refuse the left and renew attacks on the beleagured Russian I Corps.

 Nappy remains near the crux of the fighting...

...while Russian cavalry circle around to the French rear

Following up their success, the Guard cavalry turn on the worn Russian defenders. III Corps renews their attack on the Russians with a charge of their own. The Grenadiers a Cheval run down their opponents. With only 2 hits remaining, the Dutch Red lancers and the Russian dragoons eliminate each other! III Corps infantry overruns the tired Russian defenders. The Russian army breaks!

Turn 17 and the battle is won

AFTERMATH:

Despite early setbacks, the French were victorious for two reasons - Chris went ice cold at the critical point in the battle and he never used his fresh reserves. To Chris' defense, I have well over 20 games under my belt while he has a handful at best. If he were more experienced he might have seen early on I had no intentions of winning by objectives so parking troops to defend them was unnecessary. Those reserves could have put enormous pressure on my left flank and relieved the worn forces on his left. That is an enormous drain on MO dice and takes some finesse retiring units from the front lines and replacing them with reserves but it beats the alternative of not using half your army. The heroics of the French light cavalry cannot be understated! They were key to this victory. 

Chris is a quick study and I am certain every battle from here on in will be tougher and tougher. I welcome the challenge!

I hope you enjoyed the battle and, until next time...

...Happy Gaming!

Franko

Saturday, September 23, 2017

Rommel. Take 3. Breakout.

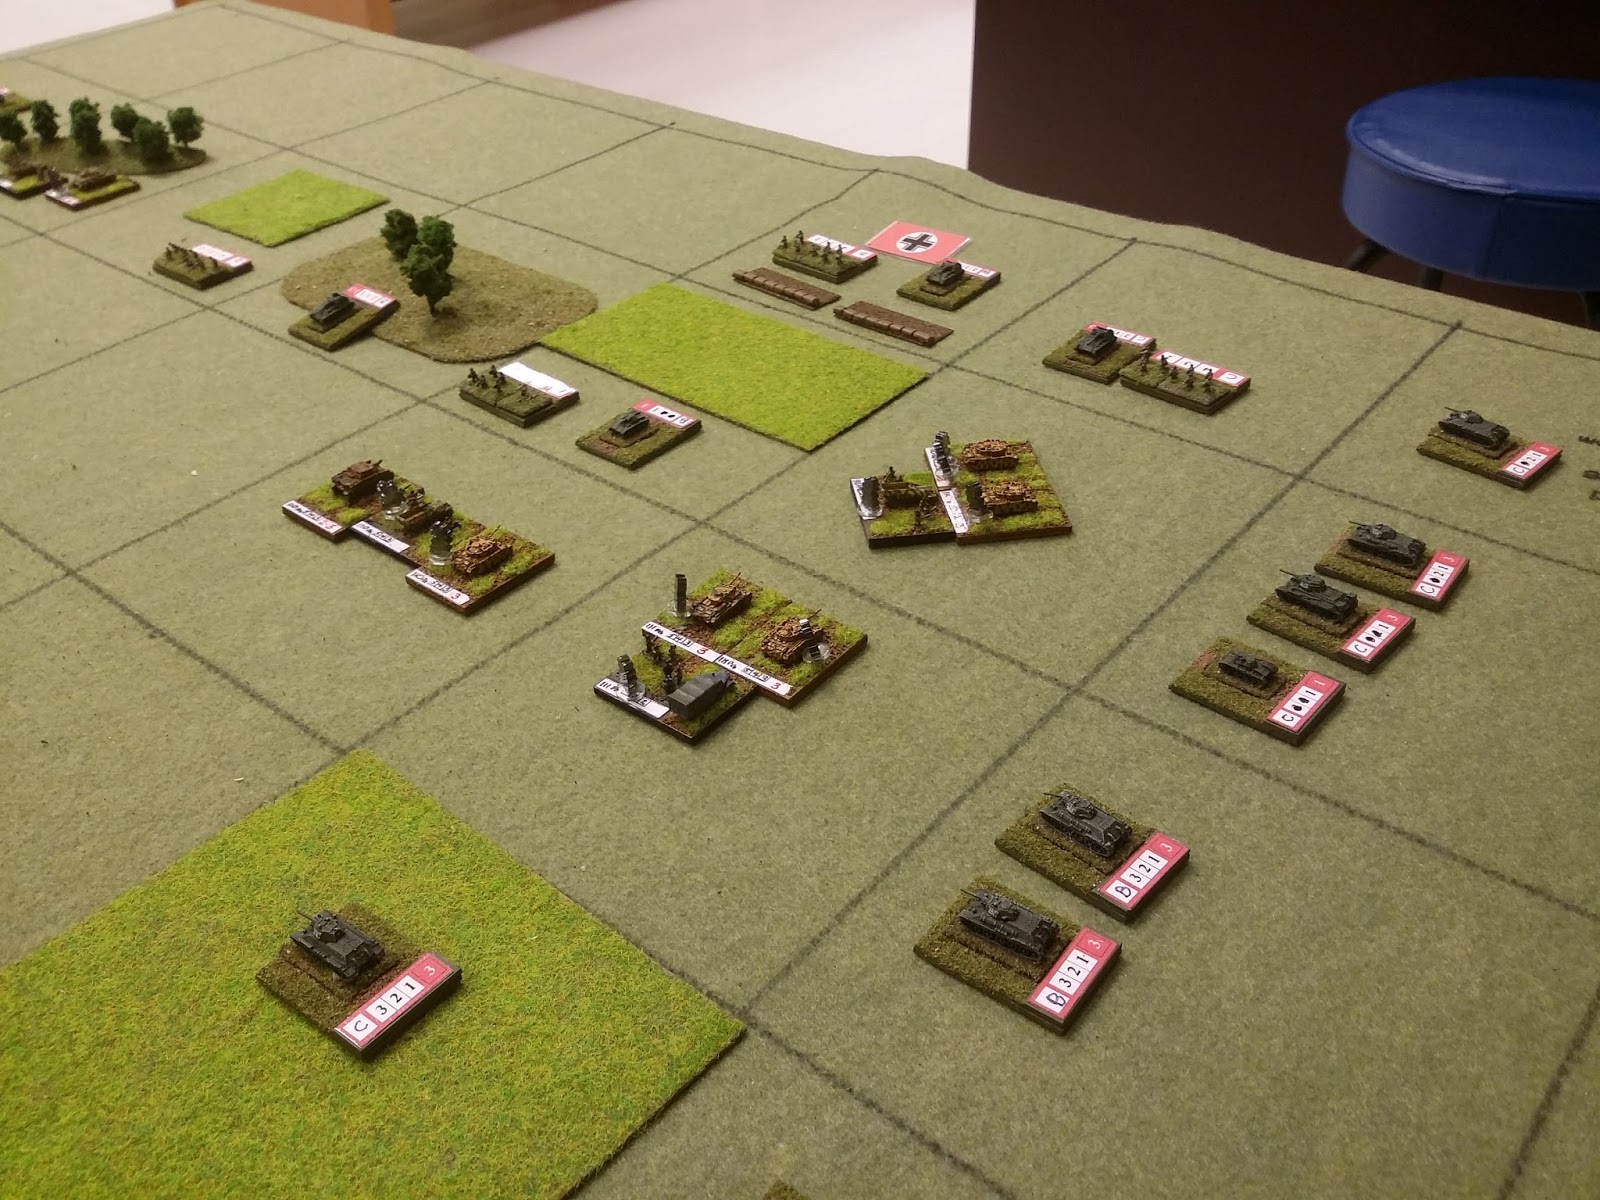
Steve and I met for our Thursday night game of Rommel. My first priority was to remember to take photos! It was my turn to be Germans and I selected 106 points from my Ghost Division - 11th Panzer. Steve chose 96 points of his Soviet 6th Tank Corps and used the difference to select Scenario #1- Breakout. We bid and construct our lists prior to scenario selection to save time. This typically makes us take more balanced and flexible units since we know nothing of the terrain or scenario yet. Steve also arrives at the hobby store early so he also sets up the map. All I need do then is select my table side.

Positions after German Turn 1

Looking at the Breakout scenario, the objectives seem daunting for the attacker. Exiting a quarter of your fighting force and securing an objective at the far end of the map while protecting your lines of communication with the enemy already on both your flanks was the design of an evil mind. That being the challenge I deployed my forces. My elements were:

15th Panzer- 
PzIV battalion
PzGrenadier battalion
Motorized battalion
15cm SPA
10.5cm SPA

110th Panzergrenadier-
Pz III Battalion
PzGrenadier battalion
Motorized battalion
2 coys Sturmpanzer IVs Infantry Support

111th Panzergrenadiers-
Pz III Battalion
Motorized battalion (Pioneer trait)

Divisional assets-
2 15cm Heavy Artillery battalions

German grab for advantageous terrain

My plan was to go aggressive and grab whatever terrain I could in the center of the map. The scenario prevents me from attacking the Soviets on turn 1. 15th Panzer drove up left center while 110th PG went right. I played the Off Road event so they wouldn't be tipped. The pioneers of the 111th PG took up defensive positions around my supply source. My artillery had no choice but to deploy unprotected in the open for barrages so the PzIIIs of the 111th hung back to both protect them and delay any Soviet efforts to cut my lines of communication. My road movement and a tactical phase saw a good push up the map with the motorized companies deploying in urban and woods terrain. I was hoping any Soviet attacks would attrit themselves against defensive positions.

Armored units push forward. Motorized infantry and supports defend the villages.

The Soviets play conservatively and retreat to cover the objective while leaving forces behind to defend his supply lines

An opportunity presented itself to destroy 2 of the 3 Soviets artillery units near the corner of the map. I played Gaps in his lines, shot through the Soviet forces and attacked his artillery with 15th Pz. I thought I had enough factors between 15 Pz and supporting barrages to obliterate them. Well, my die roll was paltry and I only scored 1 hit so 1 battery survived. Steve played Gun line and scored a hit on me and I retreated. Lost opportunity. Here is another elegant piece of design by Sam. Throughout the battle, a factor here, a shift there, a tactic or 1 pip of the die subtley changes the course of the fight. It is like drinking tequila. You may survive a shot or two but more than that you start heading towards the floor. This was just one step in that direction.

A strong armored push towards the objective by 15th Pz and the failed attack on the artillery left units vulnerable.

Which the Soviets exploited with a strong counterattack and a devastating attack roll leaving this German force combat ineffective.

I continued to put pressure on Steve with the armored units of the 15th and 110th which had to constantly defend against Soviet counterattacks. The Soviet losses were adding up but I couldn't continue taking attrition losses and hope to be strong enough to seize the all important objective. Steve later admitted he should have not attacked but let me batter my forces against his defensive wall. 

The Germans are within a kilometer of their objective!

The Soviets scrape together whatever they can to stop the German push.

But another tequila shot and a lone defender watches as the Germans retreat from the attack.

To make the situation worse, Soviet Turn 6 reinforcements arrive!

The Germans are now presented with a new set of challenges as the situation on the battlefield changes dramatically. Steve is preparing a counter-offensive with his newly arrived forces. He does spend ops to play All workers to the front and gains 6 prepared positions. Luckily for me half of them are placed in his supply squares which I have no intention of attacking. He then spends 1 op to tactically position his units. 

Even with Soviet casualties mounting to heavy levels, Steve's counterattacks have dealt concerning losses to my armored forces. I cannot afford to exit combat effective units off the map. I need them for a final push on the objective. I need to preserve my weakened units, punch a hole somewhere and exit those units to fulfill the victory conditions. The question is... how?

The Soviet counter-offensive is repulsed with heavy loss but the 110th suffers losses I cannot afford.

Meanwhile on the other flank, 15th Panzer blows through Soviet defenders and, with a follow up tactical phase, exploits and eliminates Soviet artillery punching a hole in the Soviet line.

Having survived Steve's attacks, I launched a few concentrated and well supported attacks looking to eliminate Soviet defenders and punch a hole for my weaker forces to exit the map. I also call up the pioneers of the 111th with 2 companies of their PzIIIs. I will need the armored reinforcements for the final push and the pioneers to reduce the Soviet prepared positions on the objective. I am banking on Steve's forces being too weak to mount a threat to my supply lines.

The Ghost division presses on and Soviet defenders are becoming sparce. 

The Soviet left flank collapses. The photo shows the units I was able to exit. Now all I need is that objective!

The pioneers of the 111th were able to mount a precision strike and remove one of the prepared position markers with little Soviet response. The last challenge to overcome is the jump off terrain for my final push is marsh (soft ground) meaning any attacking units are automatically tipped thereby fighting half strength. I do have worn units of the 15th Panzer that broke through and can attack from the flank but it looks like my combat factors may not be enough to eliminate a 3 unit objective defense.

The first major assault happened on Turn 11. If the objective does not fall I will need bonus turns to achieve victory.  The assault was conducted by the 110th PG and I poured everything into the attack draining my ops and using both heavy battery divisional assets. It was a devastating attack but, once again, the bartender served up another tequila shot. 3 full strength Soviet units took a beating but 1 unit remained with 1 box left. The Germans retreated. The Soviets reinforced as I could not fully isolate his objective. On bonus turn 3, worn units of the 15th Panzer are my last hope. The German gas tank was empty and the final assault was to weak to achieve victory. I shook Steve's hand. Good game.

So close. A lone Soviet defender survives the brutality of the German assault

What a great scenario! The challenges presented to both sides are difficult and it came down to bonus turns and anyone's game. I do feel it favors the defender. No, not because I lost. Early on, Steve rolled well but with low factor attacks causing casualties I didn't expect. I mentioned the "tequila effect" and that too haunted me. However; my major mid-game offensives were brutal. I can't recall how many high factor, tactics supported attacks had a die roll of 5 or 6. I was rolling hot while Steve struggled to roll a 3. My late game attacks rarely wiffed with 1's or 2's. I was still rolling well. With all that combat success I still struggled to mount more than one effective assault on the objective by nightfall. This needs to be played again! Win or lose, this was one of the most challenging and fun scenarios I have played in years!

I hope you enjoyed the report. Until next time...

...Happy Gaming!

Franko

Friday, September 1, 2017

Somewhere in Russia - A Blucher Scenario

Last night I got to play a 200 point Blucher game with my French against my friend Chris' Russians. We set up a board based on a map from a scenario book he had and did battle.

Both sides fielded 2 Infantry Corps and a Cavalry Corps with an army morale value of 5. Russian infantry included 3 elite infantry brigades supported by 2 artillery brigades of 12# guns and a horse artillery brigade. 1 Cuirassier brigade and 3 Line Cavalry brigades rounded out Chris' army.

My French consisted of standard infantry supported by 2 brigades of Horse Artillery and 4 batteries of 8# guns doled out to the infantry. The French fielded superior cavalry with 2 Cuirassier brigades and 2 Dragoon brigades all with the Shock trait.


The Russians hold a very strong position on the heights

Victory conditions were simple enough - control the village or break the enemy. Achieving that victory was another thing. Russians in defense are Steady which gives them ann additional combat die in melee. Attacking uphill means the French would lose a combat die in melee. A frontal assault would be suicide so the plan was to pin the Russians in front with III Corps while elements of II Corps used Strategic movement to attack the flank of the hill. The French cavalry on the right had to pin the Russian cavalry and prevent their galloping over to the threatened flank. I saw no other way to dislodge the Russians. I had to make them spend Momentum dice to move around and rearrange their positions hoping to defeat them in detail.

So, on Turn 1 my cavalry advanced pinning the majority of the Russian cavalry. That used 4 MO . What I didn't need was Chris' roll - 4 - under the cup meaning I just ran out of momentum. So, I showed him my intent without actually conducting my strategic flank march and the pinning force sat idle as well. 

French cavalry pin the Russians. They did their job...for now.

End of French Turn 2 sees the flanking brigades of II Corps finally get into position while the remaining 2 brigades start to advance.

Again, insufficient M.O. left III Corps standing and watching. Early bombardments from the Russian 12# guns doled out heavy casualties. This would continue throughout the day's fighting. The lack of orders also left the superior French cavalry receiving Russian charges rendering their Shock trait useless. This also would continue during the battle.

 French Dragoons in retreat. The same fate awaits the Cuirassier.

With Russian guns continuing to pound the French columns while the Russian cavalry maintained the jump on the French, the French morale quickly was in danger of breaking. The Russians managed to shore up their defense of the heights facing the French flank attack. Even faced by combined arms, Chris refused to form square and take bonus hits from my horse artillery. So, invited in, the French Chasseurs charged the lines only to be repulsed by vulnerable Russian Grenadiers and Line brigades. Nothing was going right for the French!

The height of the battle. French III Corps hasn't advanced and has already lost a brigade to enemy bombardment. II Corps has taken heavy casualties as well and has failed to dislodge the Russian flank. 

The battle steadily went downhill for the French. I guess they were uninspired as the Russians beat them at every turn outfighting the French in close combat; outskirmishing the superior French infantry who have the skirmish trait; and death dealing with bombardments from their heavy guns. Above is the last picture I took as I was too busy marking casualties and retreating brigades. My French suffered their worst defeat ever. Never did I feel they had a chance after about turn 5 or so. The early lack of M.O. dice, which continued throughout the fight, and losing almost every close combat between the cavalry forces, spelled early failure for the French attack.

Congratulations to Chris and his stout defense! Even in ignominious defeat, Blucher is a fantastic, fun game.  I look forward to our next encounter.

Until then...

...happy gaming!

Franko

Monday, April 25, 2016

Defend the village - a BFaS skirmish

All the forum posts and all the painting and research add depth to our hobby but do not replace the star of the show... the game itself. After a long layoff Scott and I arranged some time to get a couple of skirmishes in.  I am painting Imperials but they are not ready for battle so the trusty Polish-Lithuanian Commonwealth came out of the box.

The Forces:

Planning on facing Scott's Ottomans, I looked to change lists. I have had absolutely no success in the past against them and needed a change. I opted for the Lithuanian Skirmish Force (1643-1654). I felt this list gave me some good options against my nemesis.

Colonel 3 CPs
6 bases Elite Cossack Style Cavalry with spears
7 bases Dragoons
2 bases Tartars
3 bases Elite Reiters
4 bases Elite Pancerni

Total FSP: 12 Recon: 25 points

As expected Scott took his Turks from the box. He was trying the new list from the Armies of By Fire and Sword supplement recently released - Turkish Garrison of Raszkow. This force consisted of: 

Jusuf Pasha 3 CPs
12 bases European Sipahi (6 with lances)
8 bases Janissaries
6 bases Besli Cavalry
1 Mounted Aga

Total FSP: 10 Recon: 14 if I recall correctly 

The Scenario:

Scott, being the weaker force, rolled 3 dice and gave us the scenario choices. Once again Defend The Village was one of the results and selected by Scott. Of course, with Janissaries to occupy the buildings and having a mounted arm comparable to mine in quality and quantity why wouldn't he?

Deployment and my first turn. Advance on the left with Reiters screening the approach of a 2 company Dragoon force. As Scott made a rare error, I was able to advance up to one of the village buildings preparing to occupy it on turn 2. Scott has a special rule which he decided not to use at the last minute. Although it had benefits, it makes the Janissaries impetuous and they would charge out of the buildings. Without spending FSP, none left, he was forced to abandon one building. On the right, Tartar style cavalry screen my Elite Cossack and Elite Pancerni force. Scott advances into the village and positions his Sipahis to face my mounted. 2 banners of light cavalry swing around the woods on my right threating my advancing Reiters and Dragoons.

Sipahis and Cossack cavalry start the dance. I need to survive his initial lance advantage over my spears! Pancerni position for follow up charge if needed as do the remaining Sipahis. Ottoman light cavalry work around my left flank. I mishandled my positioning and my dragoons are now in danger and unable to support any attack on the village as planned.

The initial combat is a success with the Cossacks driving off the Ottomans. The best I could hope for with the bonus for the Lithuanians as the enemy lances have now shattered. 
A closer look.
Meanwhile the Lithuanian left is in pure defensive mode constantly withdrawing to stave off flank and rear attacks from the nimble Ottoman horse archers. The center sees ineffective fire on both sides.
The Tartar style cavalry move up to harass the orderless Sipahis and tempt the other Sipahis to charge while the Pancerni position for a potential flank countercharge. 
The Ottomans don't take the bait so the Tartars withdraw letting the two cavalry forces clash. The Cossacks receive a charge order to go after the orderless Sipahis.
My left continues to deteriorate as casualties mount on the dragoons.
The retreat continues!
Ottoman sipahis withdraw out of range as my charge fell just short allowing the Ottomans to freely move away. The Pancerni receive devastating flank fire from the Janissaries in the village but manage to drive off the enemy Sipahis. Casualties are mounting.
Ottoman cavalry withstand the charge of the Cossacks! This was anticipated to be a win that sends the Ottomans off the battlefield but it was not to be this day. The remaining Ottoman forces reorganize as the Lithuanians are too weak to press on.

The Lithuanian left is in full retreat. The right exhausted suffering heavy losses. A 6-0 Ottoman victory.

Another defeat at the hands of Scott's Ottomans. Well played by Scott and a lot of fun. BFaS never disappoints! Until next time...

... Happy Gaming!

Franko